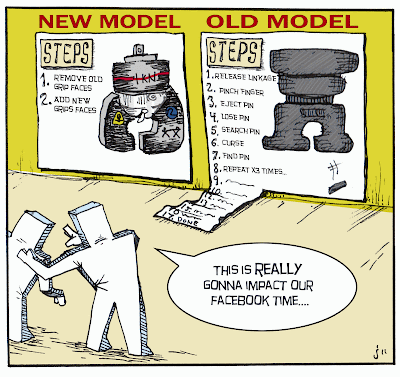
We heard from many of our customers about pinched fingers when changing grip faces. And we all know how much that can hurt. So, we developed a safety guard for our pneumatic side acting grips that virtually eliminates finger pinching.
These guards also have graduation marks that help with specimen alignment. The v-notch on the center of the guards locates the center of the clamping faces and is ideal for testing wire or round stock. You can adjust the guards laterally, which allows just enough space to insert the specimen, but not your fingers. And no matter the size of your specimen - or your fingers - these guards are available for different clamping faces.
We uploaded a "How To" video showing a lab operator using the safety guards. Take a look!
Read more
Share your ideas. Tell us your stories. Join the Instron Community.
Welcome to our new Instron Community Blog hosted by Instron. It is a compilation of the freshest, brightest, most-talented minds that Instron has to offer. The world of materials science is so vast and encompasses the broadest range of industries, materials, and challenges that no one person can possibly possess all the knowledge required to be the resident expert – or master of materials science. It takes a small army behind the scenes collaborating and sharing technical know-how, experiences, and ideas to present the most accurate, relevant, and timely information to you – our readers.
We invite you to tell us who you are, share your stories and talk about your experiences. Join the Instron Community.
Friday, April 29, 2011
Thursday, April 28, 2011
Plastics Testing Challenge 5: Testing in Non-Ambient Conditions
Most plastic products are expected to be used in various environments and conditions, some of which include cold and hot temperatures. Mechanical properties of plastics are influenced by temperature which makes it very important for designers to consider the plastic’s performance over the temperature range a given product is expected to perform in. While environmental chambers are available to simulate both cold and hot temperatures, it is challenging to identify the appropriate extensometers and fixtures to use at these extreme temperatures.
Solution: The majority of our basic standard clip-on style extensometers are designed to work within a temperature range of -100 to 200° C (-148 to 392° F), which covers a vast range of the testing needs. However, there are some applications that have higher temperature requirements, and for these applications, we recommend our high-temperature clip-on extensometers, which can be used in temperatures as high as 540° C (1004° F).
Tip: Video extensometers, such as the AVE, can also satisfy requirements for a variety of hot and cold applications. The AVE can mount to the outside door of most Instron® environmental chambers, allowing it to measure strain through the viewing window while not subjecting it to the various temperature extremes. Read more
LABELS:
Accessories,
High Temperature,
Plastics
Tuesday, April 26, 2011
Plastics Testing Challenge 4: System Compliance
System compliance and stiffness can impact results. When significantly high forces are expected, systems with inadequate frame stiffness are susceptible to absorbing energy from a specimen during testing and transferring it back into the specimen, which results in premature failure. At lower forces, compliance or elastic ‘give’ becomes more of an issue. When compliance is not corrected or dealt with appropriately, load and extension data may not be entirely representative of the material being tested.
Solution: When stiffness is important, using an appropriate testing system is critical. Stiffer testing frames will reduce system compliance. For overall compliance consider grips, fixtures, and adaptors.
Tip: The most effective way of eliminating the effect of compliance on test results is by using a strain measuring device, such as an extensometer, which can be attached directly to the specimen. Read more
LABELS:
Accessories,
Plastics,
Products
Friday, April 22, 2011
Plastics Testing Challenge 3: Strain Measurements from Modulus to Break
Challenge 3: Strain Measurements from Modulus to Break
When testing various plastics it can be difficult to select an extensometer that is capable of accurately measuring modulus and strain at break. This is true for extensometers where accuracy is inversely proportional to travel and the strain at break is 50% or higher, which is common for many thermoplastics.
Solution: For operators that remove the extensometer at yield or test materials that strain less than 50%, a traditional clip-on style extensometer is highly recommended. For operators testing higher elongation materials to failure, we have two recommendations:
1. For non-contacting measurement, the video extensometer is an excellent choice.
2. For contacting solutions, we recommend an automatic contacting extensometer where the measuring arms are counterbalanced and operate on a nearly frictionless linear guidance system. Read more
LABELS:
Accessories,
Plastics
Wednesday, April 20, 2011
Plastics Testing Challenge 2: Thin Films
Challenge 2: Thin Films
One of the most common plastics test is tensile testing of thin films. Two common challenges are often encountered including instances when specimens fail at the grip and uneven stress distributions.
Both issues are strongly influenced by the grip type, type of jaw face, and specimen alignment. When the appropriate configuration is not utilized, repeatability and reproducibility of results will deteriorate and vary.
Solution: To minimize or eliminate specimen failures at the gripping point, it is important to accurately position the specimens vertically in the tensile grips. Our new pneumatic side acting grips have an optional alignment device, ensuring that each specimen is installed in a precise vertical position, and oriented along the centerline of the load string.
Tip: Specimen preparation is an extremely important factor to consider when evaluating the repeatability of results. Specimens with nicks, cuts, and non-parallel edges will impact repeatability. Read more
LABELS:
Accessories,
Plastics
Friday, April 15, 2011
Mo and Jo Cycle the Boston Marathon
Mo and Jo are ready to go the distance in the Boston Marathon. Tell us your marathon testing stories.
Read more
LABELS:
Did You Know?,
Featured Posts,
We Test That
Thursday, April 14, 2011
Pounding the Pavement
Do your athletic shoes rebound the way you expect? Extreme sports activities, such as basketball, skateboarding or even running the Boston Marathon, are placing more challenging demands on today’s athletic shoes. These activities can result in impact forces at more than 10 times one’s bodyweight.
Shoe designers investigate the impact and rebound performance of different materials and structures. In addition to normal, daily uses, our customers are under pressure to develop new designs of sports shoes with advanced air cushioning, gel-filled capsules, or complex sole structures that offer superior technical performance.
ASTM F1614 "Standard Test Method for Shock Attenuating Properties of Materials Systems for Athletic Footwear” includes evaluating the energy returned by a shoe during impact, the amount of cushioning provided by different shoe and sole designs, and the long-term fatigue behavior of the shoe. Read more how our ElectroPuls™ Systems test to ASTM F1614.
Read more
Shoe designers investigate the impact and rebound performance of different materials and structures. In addition to normal, daily uses, our customers are under pressure to develop new designs of sports shoes with advanced air cushioning, gel-filled capsules, or complex sole structures that offer superior technical performance.
ASTM F1614 "Standard Test Method for Shock Attenuating Properties of Materials Systems for Athletic Footwear” includes evaluating the energy returned by a shoe during impact, the amount of cushioning provided by different shoe and sole designs, and the long-term fatigue behavior of the shoe. Read more how our ElectroPuls™ Systems test to ASTM F1614.
LABELS:
Featured Posts
Wednesday, April 13, 2011
Top 5 Challenges and Solutions in Plastics Testing
Plastics are utilized in virtually every facet of our lives from the bottle that holds our beverage to the dashboard of our automobile. To ensure a high-quality end product it is important to understand the physical properties of these plastics throughout their lifecycle starting from the raw material.
In preparation for ANTEC we’ve prepared solutions to the top five challenges our customers face when testing plastics. Read the first Challenge/Solution now!
Challenge 1: Reproducibility
Reproducibility has proven to be a common issue in many labs when measuring Poisson’s Ratio. The difficulty in measuring the ratio directly relates to the measurement of the transverse and axial strain at very small strain ranges.
Solution: We recommend using a bi-axial, high-resolution extensometer that can measure both axial and transverse strain simultaneously.
Tip: We can’t stress enough that you use the appropriate grips and test methods. For grips, we suggest pneumatic side-acting grips because they are self-aligning and permit adjustable clamping pressures. When setting up your test method, a “preload” can improve your repeatability or results by removing the compressive loads applied during gripping and allowing each test to begin at the same positive load or stress value.
*Note: the preload value should be high enough that it will straighten a specimen without stretching it. Read more
LABELS:
Accessories,
Plastics
Monday, April 11, 2011
Uniting in the Community
We believe, as an organization, it is imperative to be involved in the communities in which we live. Never seeing it as a “job” or “responsibility”, our colleagues have willingly and happily participated in The United Way of Tri-County for the past three years.
We are humbly pleased to announce the three awards presented to our Community Connection Committee (C3 Committee) at this year’s United Way breakfast:
2010 Corporate Volunteerism Award for Existing Companies: Continuing to show a commitment to volunteerism over the last 3 years by participating in at least three United Way of Tri-County volunteer opportunities that have significantly impacted the community
2010 Most Improved Business Campaign Award: An outstanding increase in employee giving & participation
2010 Campaign Coordinator Award: Outstanding performance in aiding workplace participation, community involvement, and partnerships
Read more
We are humbly pleased to announce the three awards presented to our Community Connection Committee (C3 Committee) at this year’s United Way breakfast:
2010 Corporate Volunteerism Award for Existing Companies: Continuing to show a commitment to volunteerism over the last 3 years by participating in at least three United Way of Tri-County volunteer opportunities that have significantly impacted the community
2010 Most Improved Business Campaign Award: An outstanding increase in employee giving & participation
2010 Campaign Coordinator Award: Outstanding performance in aiding workplace participation, community involvement, and partnerships
LABELS:
Community,
Featured Posts
Tuesday, April 5, 2011
How Should I Measure Strain?
There are two ways to ensure your strain results are accurate: measuring with crosshead movement or measuring with system compliance.
Crosshead movement is measured using a high-resolution encoder. When you move the crosshead with no specimen installed, the reported measurement of that movement is often more accurate than for many extensometers.
However, when you install a specimen and apply a tensile or compressive load, the accuracy of the measurement of crosshead movement becomes dependent upon the “system compliance.”
Compliance refers to the tendency of the various components of a testing system to deflect under load. Consider every component in a testing system as equivalent to a very stiff spring. When you apply a load to that component, even a major item such as a crosshead, it will deflect, either bending, stretching, or compressing. If it is a very stiff spring the deflection is tiny, but still measurable. Compliance is the inverse of stiffness; the more stiff, the less compliant.
There are three sources of compliance in a system: the load frame, the load string components, and the specimen itself.
• The load frame is designed with a very high stiffness. We measure the stiffness at a particular load and publish that figure as part of the specifications of the load frame.
• Load string compliance is usually not known. There may be few or many components in a load string: grips or fixtures, couplings, or one or more load cells. Many components do not have published stiffness values.
• The specimen compliance is usually what you are trying to measure.
As a rule of thumb, if the compliance of your specimen is around 100 times greater than the compliance of the load frame and the load string components, you can assume that the reported crosshead movement is equivalent to the deflection experienced by the specimen. However, if you are testing a very stiff specimen, you should always use an extensometer to measure specimen deflection.
If it is not possible for you to use an extensometer, then you should evaluate the system compliance before the test. Either install an extremely stiff specimen and apply a tensile force, or install compression platens and apply a compressive force with the platens touching each other. The resulting deflection measurement gives a close indication of the system compliance. When you test the specimen, you can remove this value from the result.
Are you experiencing issues when measuring strain? Or do you still have questions? Leave us a comment .... Read more
LABELS:
FAQs
Friday, April 1, 2011
With the new style pneumatic grips……
Changing grip faces is quick and easy, and requires NO tools or pins. And now when you return your old grips you can save $750 on the purchase of a new set of grips. Sounds too good to be true? It's not – it’s real! Read full details.
Read more
Read more
LABELS:
Accessories
Subscribe to:
Posts (Atom)