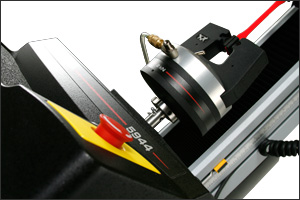
Instron’s reputation depends upon the quality of its products, the accuracy of its measuring devices, such as load cells and extensometers, and its services to regularly verify that those devices are performing to a required standard. For many years, the tag line “The Difference is Measurable” has shown our commitment to this accuracy. But how do we show it in practice?
 A measurement offers a quantitative value to a property of an item. How heavy is it? How long is it? How hot is it?
No measurement can be said to be completely accurate. There is always some degree of doubt about the result of a measurement. For example, there may be some degree of inaccuracy in the measuring device itself or there may be differences in how people perform or read a measurement. That doubt is called the uncertainty of the measurement.
In short, any measurement result is only complete when a statement of the uncertainty in the measurement accompanies it. When the uncertainty in a measurement is evaluated and stated, you can properly evaluate the quality of the measurement.
There are many different accreditation organizations worldwide, and several in the USA. To ensure that the different accreditation organizations harmonize their standards and processes so that they can accept each other's accreditations internationally, the International Laboratory Accreditation Cooperative (ILAC) was established and has now more than 70 accreditation bodies worldwide as signatories to their Mutual Recognition Arrangement (ILAC-MRA).
In 2010, ILAC published the ILAC Policy for Uncertainty in Calibration to harmonize the expression of uncertainty of measurement on calibration certificates and on scopes of accreditation of calibration laboratories. One of the major requirements of this policy is that each calibration verification
measurement should be accompanied by the associated uncertainty measurement.
Take a look at your last calibration certificate. If you have a certificate issued from another calibration laboratory, you may see only a general statement relating to uncertainty of measurement. However, if the Instron Calibration Laboratory has issued your certificate, you will see that each individual result is accompanied by an uncertainty measurement that has been calculated with that result.
Instron has long considered the reporting of uncertainty of measurement to be good metrological practice and has been reporting measurement uncertainties that are consistent with the new ILAC requirements for many years. Instron’s commitment to offering quality products and services shows in many ways. The accurate reporting of measurement uncertainty with every calibration result is one more reason why we say:
The Difference is Measurable.
 A measurement offers a quantitative value to a property of an item. How heavy is it? How long is it? How hot is it?
No measurement can be said to be completely accurate. There is always some degree of doubt about the result of a measurement. For example, there may be some degree of inaccuracy in the measuring device itself or there may be differences in how people perform or read a measurement. That doubt is called the uncertainty of the measurement.
Good practices, such as regular maintenance and traceable calibrations, careful calculations, regular training, and accurate and consistent record keeping all help to maintain system performance and increase measurement accuracy. However, to properly judge the quality of any measurement, we need to quantify and report the uncertainty associated with that measurement.
We need to know two things: the width, or interval, of the margin of uncertainty, and how confident we are that the true value is within that margin. For example, we might say that the gauge length of a specimen measures 25 mm, having an uncertainty of measurement of 0.11 mm with a 95% confidence level. This
means that we are 95% sure that the gauge length is between 24.89 mm and 25.11 mm. The uncertainty statement is an indication of the quality of the measurement.
In short, any measurement result is only complete when a statement of the uncertainty in the measurement accompanies it. When the uncertainty in a measurement is evaluated and stated, you can properly evaluate the quality of the measurement.
Instron’s calibration standards and processes in North America and Asia are accredited by the National Voluntary Laboratory Accreditation Program (NVLAP). NVLAP is a program administered by the National Institute of Standards and Technology (NIST), the National Metrology Institute (NMI) of the United States. NVLAP regularly assesses Instron’s competence in performing accurate calibration and verification processes including the accuracy of the equipment used in those processes.
In 2010, ILAC published the ILAC Policy for Uncertainty in Calibration to harmonize the expression of uncertainty of measurement on calibration certificates and on scopes of accreditation of calibration laboratories. One of the major requirements of this policy is that each calibration verification
measurement should be accompanied by the associated uncertainty measurement.
Take a look at your last calibration certificate. If you have a certificate issued from another calibration laboratory, you may see only a general statement relating to uncertainty of measurement. However, if the Instron Calibration Laboratory has issued your certificate, you will see that each individual result is accompanied by an uncertainty measurement that has been calculated with that result.
Instron has long considered the reporting of uncertainty of measurement to be good metrological practice and has been reporting measurement uncertainties that are consistent with the new ILAC requirements for many years. Instron’s commitment to offering quality products and services shows in many ways. The accurate reporting of measurement uncertainty with every calibration result is one more reason why we say:
The Difference is Measurable.

No comments:
Post a Comment